How to Create Engaging Swipe Posts on LinkedIn Using Canva
How to Create Engaging Swipe Posts on LinkedIn Using Canva
LinkedIn swipe posts, also known as carousel posts, are an excellent way to engage your audience with visual storytelling. Whether you're teaching a concept, sharing a case study, or promoting a product, this guide will show you how to create a compelling LinkedIn swipe post using Canva, while leveraging AspireConnect to capture leads and track engagement.
Why Use LinkedIn Swipe Posts?
Swipe posts on LinkedIn allow you to share multi-step processes, tell stories, and present information in a digestible, visual format. They are particularly effective for business professionals looking to showcase their expertise or offer valuable insights.

Step 1: Plan Your Content
Before diving into Canva, start by planning your swipe post content. I made a great tutorial if you struggle with this kind of thing here: https://www.linkedin.com/posts/bill-fow_how-to-create-engaging-story-posts-when-you-activity-7236381931179814912-HdUg?utm_source=share&utm_medium=member_desktop
Define Your Goal:
Example: If you're promoting a new product, your goal might be to explain its key features and benefits. If you’re sharing a case study, your goal could be to walk your audience through the problem, solution, and results.
Structure Your Story:
First Slide - Start with a Strong Hook:
Example: If your swipe post is about increasing productivity, a strong hook could be: “Struggling to Get Things Done? Here’s How to Boost Your Productivity by 50% in Just One Week!”
Example: For a product launch: “Introducing the Future of AI-Powered Marketing: Meet [Your Product Name]”
Middle Slides - Develop Your Narrative:
Example: Break down your content into 3-5 key points. For a productivity post, these could be actionable tips like: “Prioritize Your Tasks,” “Eliminate Distractions,” and “Use Time-Blocking.”
Final Slide - End with a Clear CTA:
Example: “Ready to Skyrocket Your Productivity? Download Our Free Guide Now!” or “Want to Learn More? Visit [Your Website] for a Free Demo!”
Step 2: Design Your Slides in Canva
Now that you’ve planned your content, it’s time to bring it to life visually.
Create a New Design: Log in to Canva and click on "Create a design." Choose "Custom size" and set the dimensions to 1080x1080 pixels for square posts or 1080x1350 pixels for a portrait format.
Example: If your brand colors are blue and white, make sure these are the dominant colors in your design.
Design Each Slide:
Example: If your first slide is the hook, use bold text and an eye-catching background. If your brand is in tech, perhaps include an abstract graphic or a clean, modern font.
Example: For the middle slides, include icons or visuals that represent each tip or key point you’re making. For instance, if discussing “Eliminating Distractions,” use an icon of a crossed-out phone or social media app.
Example: Keep each slide concise. A good rule of thumb is one main idea per slide, with a maximum of 15-20 words.
Organize Your Slides:
Example: Ensure each slide logically follows the previous one. For example, if you start with a problem, the next slide should naturally lead into the solution you’re offering.
Step 3: Export and Upload Your Carousel to LinkedIn
Once your design is ready, you need to export it from Canva and upload it to LinkedIn.
Download Your Design as a PDF:
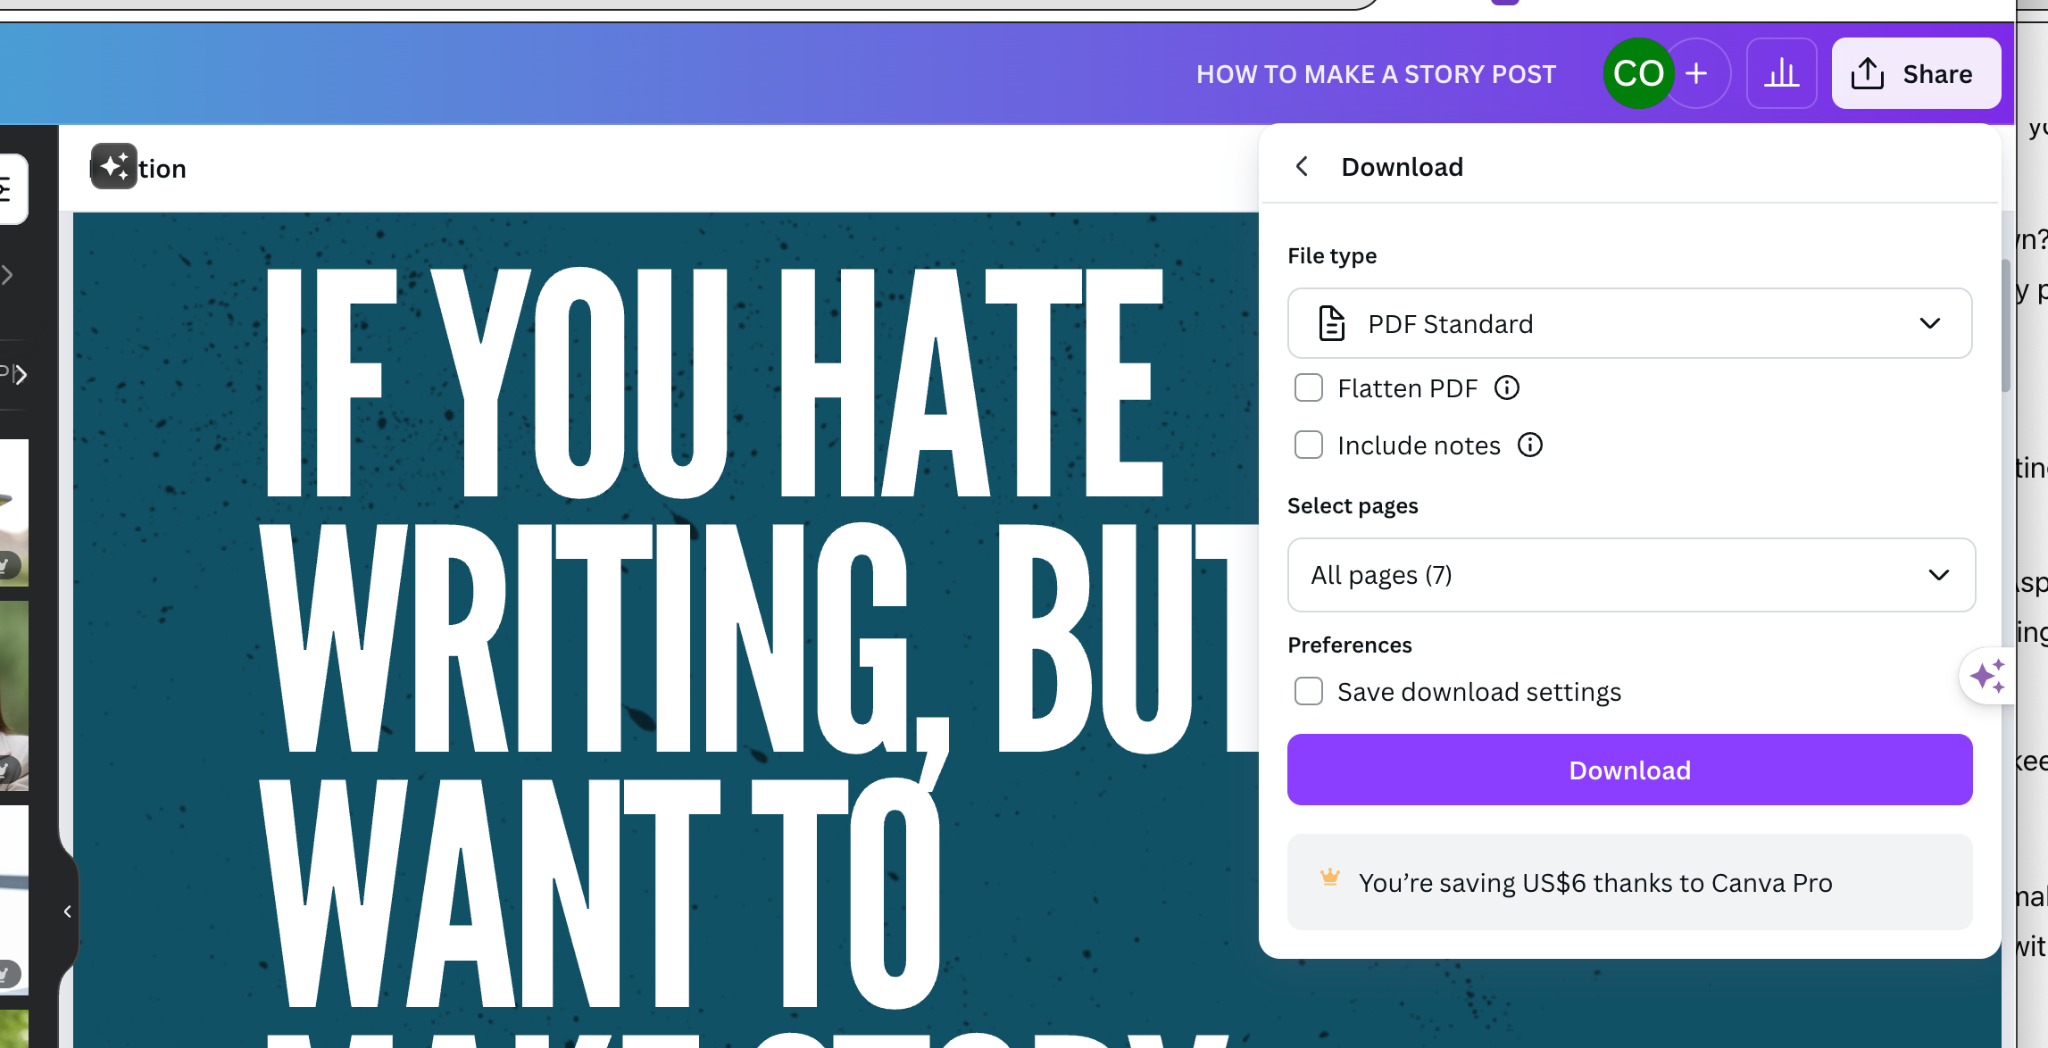
Example: After reviewing your slides, click the "Share" button in Canva, select "Download," choose "PDF Standard," ensure all pages are selected, and click "Download" to save the file to your computer.
Upload Your PDF to LinkedIn:
Example: Log in to LinkedIn, click "Start a post," and select "Document." Upload your PDF, and LinkedIn will convert this into a swipeable carousel.
Add a Compelling Caption:
Example: If your swipe post is about productivity tips, your caption could be: “Ever feel like there aren’t enough hours in the day? Swipe through these 5 tips to boost your productivity, and let me know which one you’ll try today!”

Step 4: Capture Leads with AspireConnect
Your LinkedIn post is live, but the real value comes from turning views into leads.
Create a Custom Link or Form:
Example: If your CTA is to download a guide, use AspireConnect to create a landing page with a sign-up form. This page could include fields like Name, Email, and Company, which are essential for capturing leads.
Track Engagement:
Example: Use AspireConnect to monitor how many people clicked on your CTA, filled out the form, and engaged with your content. Track metrics such as lead conversions and page visits to see which parts of your swipe post resonated most.
Step 5: Analyze and Optimize Your Swipe Posts
Finally, it’s essential to measure and improve your efforts.
Review LinkedIn Analytics:
Example: After a week, review your LinkedIn analytics. If you see high engagement on the first and last slides but a drop-off in the middle, consider simplifying your middle slides in future posts.
Refine Your Approach:
Example: If you notice that posts with more visual elements (like icons and images) perform better, focus on incorporating more visuals into your next carousel.
Repeat the Process:
Example: Use the insights from your analytics to craft even better content for future LinkedIn swipe posts, continually refining your strategy to maximize engagement and conversions.
By following this guide and incorporating these examples, you’ll be able to create visually appealing and engaging LinkedIn swipe posts using Canva. This method is ideal for solopreneurs, coaches, and small business owners looking to maximize their impact on LinkedIn. And remember, AspireConnect is there to help you streamline the entire process, from content creation to lead conversion.
Posting Carousel Content on Instagram and Facebook
Creating and sharing carousel content on Instagram and Facebook can have a significant impact on engagement, but it’s essential to understand how each platform handles this content type differently. Here’s what you need to know and how to best approach it using Canva.
Instagram: Swipeable Carousels
Instagram is designed with carousel posts in mind, allowing users to swipe through multiple images or videos in a single post. This feature makes it easy to tell a story or share multiple pieces of content in a cohesive way. If you’re looking to maximize engagement on Instagram:
Create Your Carousel in Canva:
Use Canva to design each slide of your carousel. Stick to a consistent theme, style, and message across all slides.
For Instagram, you can create square (1080x1080 pixels) or portrait (1080x1350 pixels) designs. The portrait size occupies more screen space, which can be more engaging for users.
Post Directly to Instagram:
After creating your carousel, download the slides as separate images or as a single PDF if using Canva. Upload these directly to Instagram as a carousel post.
Make sure to include engaging captions, hashtags, and a strong call-to-action (CTA) to encourage interaction.
Auto-Publish to Facebook:
If you have your Instagram account linked to Facebook, you can choose to auto-publish your carousel post. On Instagram, this will retain the swipeable carousel format, but on Facebook, it will display as a series of individual images that users can scroll through.
Facebook: Adapting the Content
While Facebook supports posting multiple images, it doesn’t have a true swipeable carousel feature for standard posts as Instagram does. This means that when your Instagram carousel auto-publishes to Facebook, it will appear as a series of separate images that users can scroll through one by one.
Options for Optimizing Carousel Content on Facebook:
Video Slideshow:
To maintain a fluid storytelling experience, consider turning your Canva-designed carousel into a video slideshow. This ensures that the narrative flows smoothly and keeps users engaged from start to finish.
In Canva, you can create a video by arranging your slides in order, adding transitions, and exporting the design as an MP4 file. Upload this video to Facebook instead of separate images.
Facebook’s Slideshow Feature:
Alternatively, you can use Facebook’s built-in slideshow feature. Upload your images, and Facebook will automatically turn them into a video with transitions. This is a quick and easy way to get similar results without leaving the platform.
Options for Facebook: Slideshow, GIF, or MP4
When creating engaging content for Facebook, you have several options to consider:
Option 1: Facebook Slideshow
Create Your Design in Canva:
Design each slide as you normally would, ensuring that your content is the right length for readability.
Upload to Facebook as a Slideshow:
Export your individual slides as images (JPEG/PNG) from Canva.
Go to Facebook and select the “Create Slideshow” option.
Upload your images in the desired order and adjust the slideshow settings as needed.
Option 2: Export as a GIF
Create Your Design in Canva:
Design each slide in the correct sequence.
Export as a GIF:
Click the “Share” button in Canva, select “Download”, and choose “GIF” as your file type.
Download the file and upload it directly to Facebook.
Note: Canva automatically sets the duration for each slide in the GIF based on your design’s readability. If the content moves too quickly or slowly, adjust your content within Canva to ensure it aligns correctly.
Option 3: Export as an MP4
Create Your Design in Canva:
Arrange your content as usual within Canva.
Export as an MP4:
Click the “Share” button in Canva, select “Download”, and choose “MP4 Video” as your file type.
Download the video and upload it to Facebook.
Note: Like with the GIF, Canva will automatically handle the timing of your slides in the video format. If adjustments are needed, return to Canva and modify the content to ensure it flows correctly.
Instagram Note:
When you post on Instagram, it can automatically publish to Facebook. If you upload your Canva design as a carousel post on Instagram, it will appear as individual images on Facebook. However, exporting as a GIF or MP4 from Canva ensures that the content remains a cohesive, swipeable story when shared across platforms.
